Throughout the semester we will be using Python for our hands-on AI work. While there are other languages and methods of using AI tools, my impression is that Python offers both the most robust set of tools and the most user-friendly access to general purpose tools.
One textbook source that we will use for this and other classes is Jake VanderPlas’ Python Data Science Handbook. This book is freely available in several formats, including a PDF and as Jupyter Notebooks. 
Running Python - Python Shell
As the text notes in the first chapter, there are several ways of running Python. Python is an incredibly flexible programming language with lots of different applications and use cases, as such, one method is not always best for all uses.
- You can run Python applications on your own computer, on various websites, and on computer clusters like HiPerGator.
-
You can run Python from a command prompt, typing commands into a shell as shown in the image below.
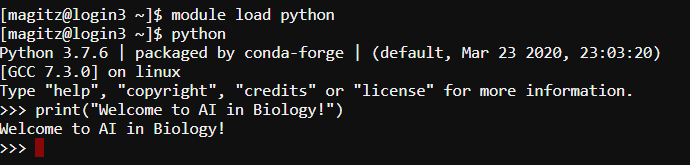
- Using the Python shell, you type commands one-by-one and each is executed as you hit enter. The shell is limited however in that it is difficult to save your work, edit errors, or work with more complex code.
- The shell can be helpful for quick testing, but I rarely use the shell.
- You can, as the text notes, get a Python shell in the Jupyter environment…again, not sure we’ll use it much, if at all.
Running Python - Jupyter / IPython Notebooks
Notebooks are part of what is often referred to as “literate programming”. They allow you to mix code, output, richly formatted text and images all on one page, usually viewed in a web browser. The idea is that you can cleanly document, using formatted text (headers, bold, lists, images, etc.) what each block of code does, explaining each block’s purpose, functionality, etc. This enables you to tell a story with your code and data.
The text uses IPython notebooks, which are a slightly older, but mostly compatible, version of what are now more generally referred to a Jupyter Notebooks. Jupyter stands for Julia, Python and R, and indeed, Jupyter supports these and other languages, not just Python, hence the name change as functionality was expanded.
As with Python itself, there are several options for running Jupyter Notebooks.
Jupyter Notebooks via GitHub Codespaces
It can sometimes take some time for HiPerGator accounts to be created. So that we can dive into the content of the class, we will start by using GitHub Codespaces. The main limitation, and why we will certainly want HiPerGator later in the semester, is that Codespaces are CPU-only. When we get to the deep learning portions of the course, a GPU will become more and more important!
Jupyter Notebooks via ood.rc.ufl.edu
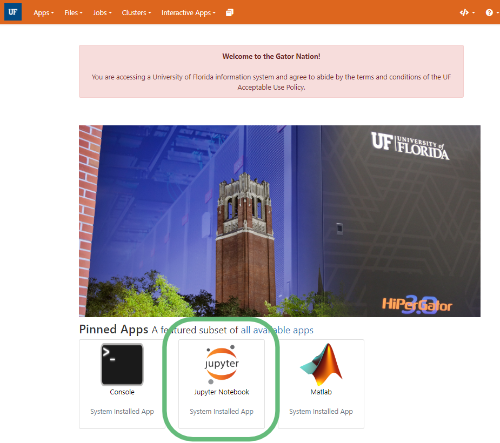
Perhaps the easiest method for running Jupyter notebooks on HiPerGator is to use the ood.rc.ufl.edu server.
After logging in with your GatorLink username and password, you should get to a page that looks like the image below.
- Click on the Jupyter Notebook App card on the main page of OOD. Alternatively, you can use the Interactive Apps menu, scroll all the way to the bottom, and select Jupyter Notebook.
- The next screen allows you to request resources to run a job on HiPerGator.
- The suggested resource request for the first half of the courses is:
- Number of CPUs: 2
- Maximum Memory: 15GB
- SLURM Account and QOS: Group name as needed (
bsc4892). - Time Requested: 1
- Cluster Partition: default
Note that later in the semester, we will use a GPU, but for now, it is not really needed.
- Click the Launch button, which will submit your job.
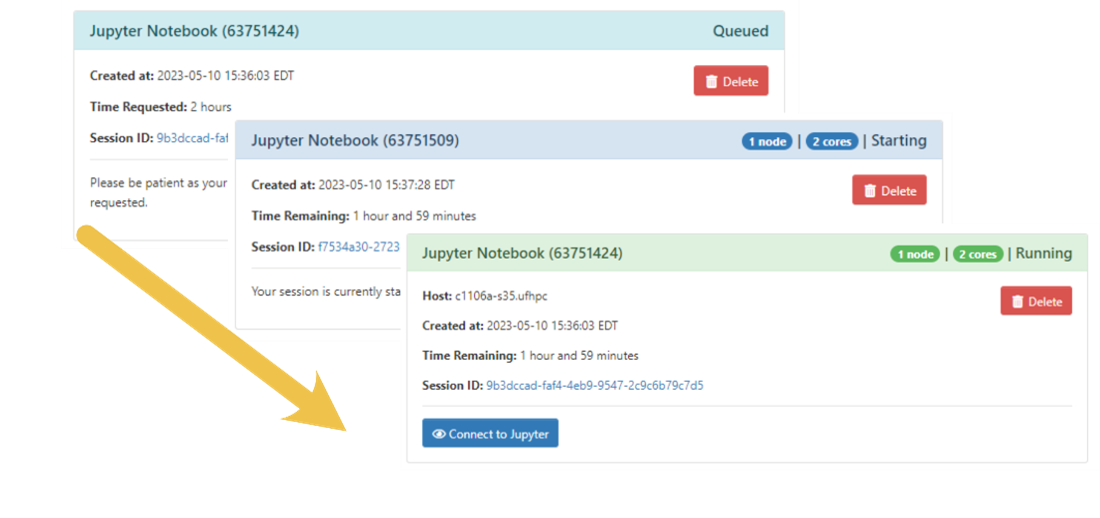
- Clicking the “Connect to Jupyter” button will open a new tab and should open with a window like what is pictured below—on future connections, it will normally open with the documents you had opened last time.
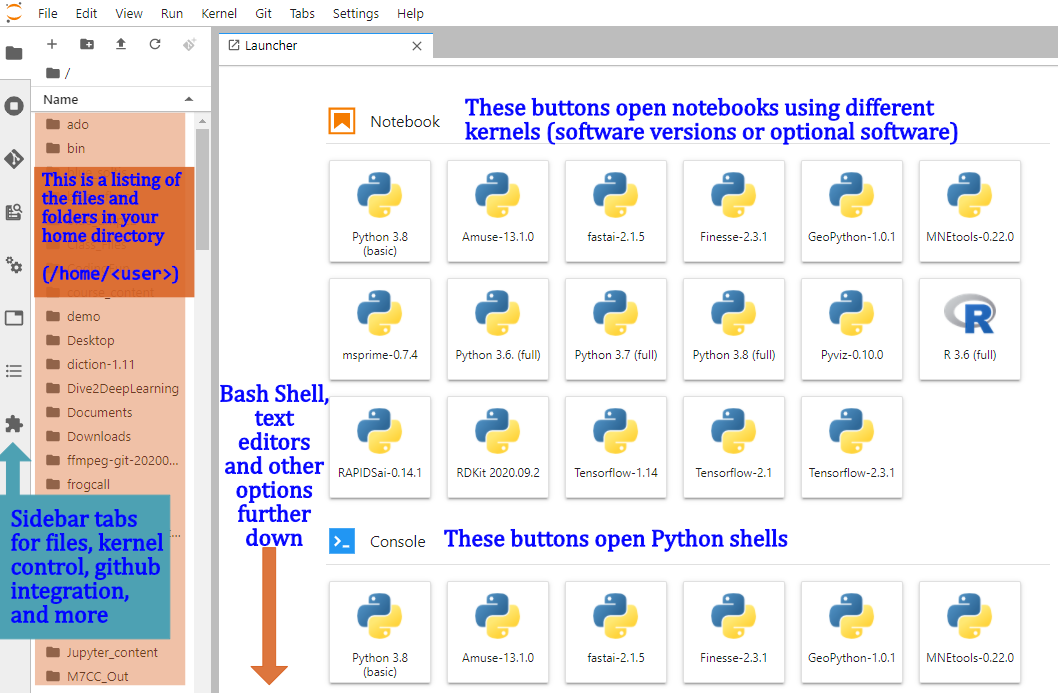
Create a Symlink to /blue/bsc4892
The first thing to note is that Jupyter does not know about storage outside of your home directory. In order to navigate to different parts of the cluster, we need to add links to those other places. To do this, scroll down in the Launcher window shown above to the “Other” section and click the Terminal button: 
At the Bash prompt, type the command below to create a symbolic link (kind of like an alias on MacOS or shortcut on Windows) to the /blue/bsc4892 folder in your home directory and name it blue_bsc4892. Note: everyone is in the bsc4892 group whether they are undergraduates or graduates.
ln -s /blue/bsc4892 blue_bsc4892
Once you hit enter, you should see a folder named blue_bsc4892 in the left-hand panel with your home directory contents (orange shaded region above).
Click through the folders to get to blue_bsc4892/share/Jupyter_Content/Intro_to_Jupyter.ipynb and open that.
We will pickup with using the notebook after looking at other methods of running notebooks.
Jupyter Notebooks via Google Colaboratory
If you find yourself not able or wanting to use HiPerGator, Google offers a (mostly) free service called the Google Colaboratory at https://colab.research.google.com/. You do need a Google account, and remember that UF work should be conducted with a UF affiliated Google account.

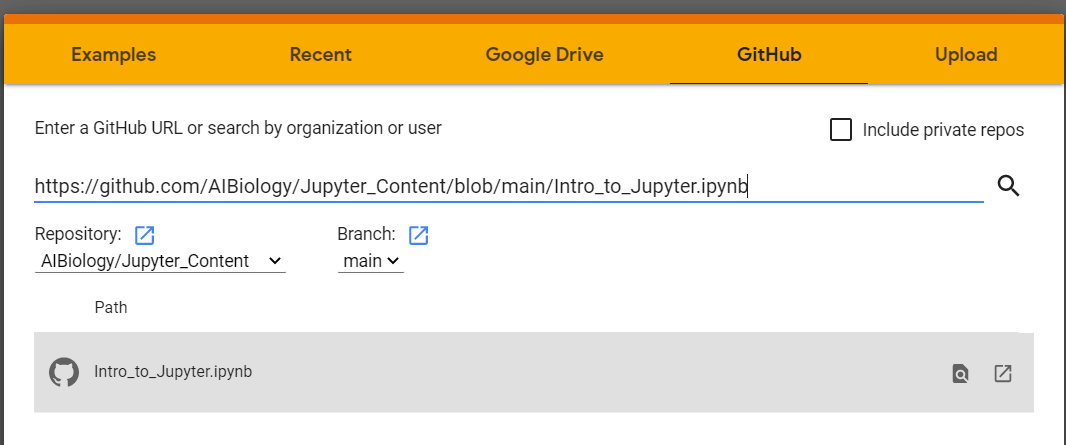
From this screen you can open example notebooks, recent notebooks, locate notebooks on your Google Drive, open notebooks from GitHub repositories, upload .ipynb files, or create a new notebook.
Click on the GitHub tab and enter the URL https://github.com/AIBiology/Jupyter_Content/blob/main/Intro_to_Jupyter.ipynb Click on the Intro_to_Jupyter.ipynb file.
Pros and Cons of Jupyter via Google Colaboratory
| Pros | Cons |
|---|---|
| Can be easy | Not 100% compatible with Jupyter |
| No HiPerGator account needed | Some resource limitations/slowness |
| Can use Google Drive files | Need to reinstall modules each time |
Jupyter Notebooks on your own computer
Again, there are several options here, I won’t go into great detail because, especially for AI research, you will need more resources than a standard computer has. But for some use cases, running notebooks locally on your computer is the easiest option. To do this there are a couple of easy solutions.
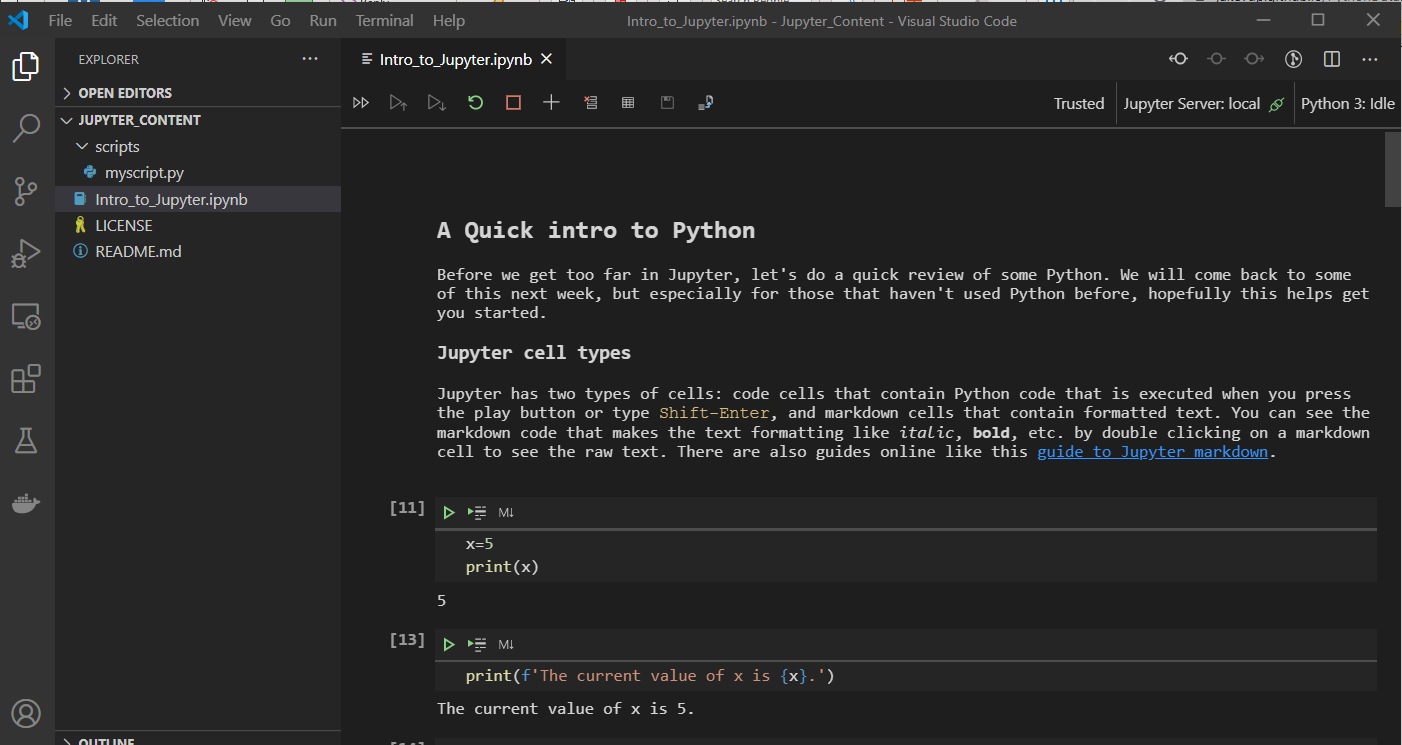
Local Notebooks in VSCode
Microsoft VS Code is a very nice, free, cross platform, text editor. VSCode now runs Jupyter Notebooks natively. You do need to install Python, but that can also be done with a click of a button in VSCode.
Local Notebooks with Anaconda
The other common way to run notebooks locally is with Anaconda Python. The free version covers most uses and has a built in server that launches notebooks in your browser very similar to the Open On Demand interface. Anaconda can be a large install and can be a bit slow, especially on older computers.
Running Python - Scripts
We likely won’t spend much of the semester on writing Python scripts, but this is always an option. Data Science and AI research tends to be somewhat more exploratory and even many “production” use cases rely on notebooks as step-by-step evaluation and adjustments are commonly needed. That said, after testing and development in notebooks, it is very easy to export your notebook to a script to run on larger datasets.
And now onto Jupyter!
After all of that, we are finally ready to look at the Jupyter_Intro.ipynb notebook! return to the jhub.rc.ufl.edu, ood.rc.ufl.edu, Google Colab or local copy of the notebook.